English

How to Fix a Leaky Kitchen Sink: Simple DIY Solutions
April 27, 2025
Post Views: 5615


Jabra Sanitary is a sanitaryware supplier offering toilets, sinks, faucets, bathtubs, etc., at competitive prices. If you're a distributor, wholesaler, or project contractor, get a quote today!
 $23.9 Limited-time Offer
- Consignment Policy
- 20 Years of Experience
Did you know a leaky kitchen sink can waste up to 20 gallons of water daily? That's enough to fill a bathtub! Leaks cost American households $500 a year. If left unchecked, a leaky kitchen sink can lead to bigger headaches like water stains, mold growth, or even structural damage to your home.
But here's the good news: kitchen sink leak repair doesn't have to be a daunting task. With a few basic tools, a bit of patience, and our step-by-step guidance, we're confident you'll master how to fix a leaking kitchen sink in under an hour and save $200+ on plumbing bills.

Table of Contents
Common Causes of a Leaky Kitchen Sink
How to Identify the Source of the Leaking Kitchen Sink
Step-by-Step Guide to Fixing a Leaky Kitchen Sink
Fixing Leaks Around the Sink Base or Countertop
When to Call a Professional Plumber
Preventing Future Kitchen Sink Leaks
FAQs
Conclusion
Common Causes of a Leaky Kitchen Sink
Before we examine the kitchen sink leakage solution, it's important to understand what might be causing it. After all, knowing the root of the problem is half the battle won!
There are several common culprits behind a leaky kitchen sink, and they're often easier to fix than you might think.
Worn-out Gaskets or Washers
Gaskets are FDA-grade rubber components designed for X psi pressure. Over time, with all the turning on and off of the faucet, they can wear down, crack, or even disintegrate. When that happens, water starts to seep through, and you end up with that annoying drip.
Corroded Valves or Pipes
Another sneaky culprit behind a leaky sink is corrosion. Do you know how metal can rust when it's exposed to water for too long? Well, the same thing can happen to the valves and pipes under your sink.
Over time, the constant flow of water can cause these metal parts to corrode, weaken, and eventually spring a leak.
Loose Connections
70% of leaks stem from loose connections. Pipes and fittings under your sink are held together by nuts and bolts, and if these aren't tightened properly, water can find its way out.
This can happen if the sink was installed incorrectly or if the vibrations from daily use have loosened things up over time.
Clogged Drains
A clogged drain might not seem like it would cause a leak, but it can. When your drain is blocked, water can't flow through properly, and it might start backing up into places it shouldn't be, like around the sink's edges or through tiny gaps in the plumbing. <Check how to unclog a kitchen sink>
Imagine trying to pour water into a funnel that's already full—it's going to overflow and make a mess.
Faulty Drain Assembly
Sometimes, the issue lies with the drain assembly itself. This is the part that connects your sink to the plumbing system, and if it's faulty—maybe due to a manufacturing defect or damage from use—it can cause leaks.
Old Plumber's Putty or Silicone Caulk
Lastly, don't overlook the role of plumber's putty or silicone caulk. These are used to create a waterproof seal around the sink and faucet, but over time, they can dry out, crack, or shrink, losing their effectiveness.
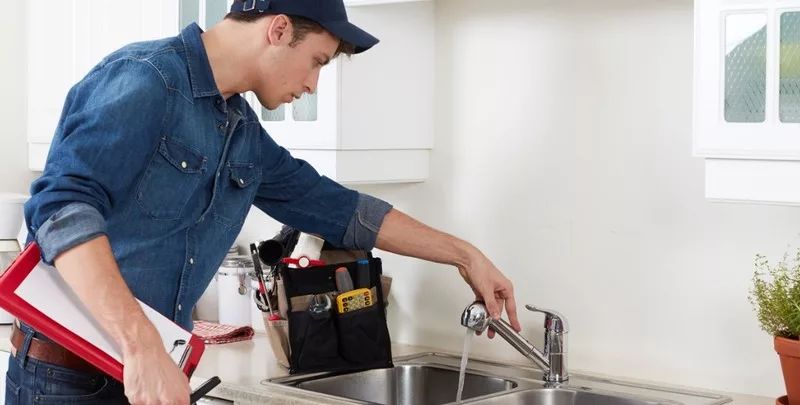
How to Identify the Source of the Leaking Kitchen Sink
Before we know how to fix leaky kitchen sinks, we need to know exactly where the water is coming from. Identifying the leak isn't hard if we take it step by step. We'll check the faucet, the drain, and the pipes, and even make sure it's not just condensation tricking us.
Step 1: Dry the Area
First, we need to dry everything around the sink. If the area is already wet, it's tough to tell where new water is coming from when we test it. Imagine trying to spot a new spill on a soaked towel—it's way easier if the towel's dry to start with!
Grab a towel or dry cloth and wipe down the sink, the faucet, and the space underneath where the pipes are. Pay extra attention to the spots around the faucet base and pipe connections. Once it's all dry, we're set to find the leak.
Step 2: Run Water and Look for Leaks
Now that everything's dry, let's run some water and see where it escapes. We'll check a few key spots to catch the leak in action.
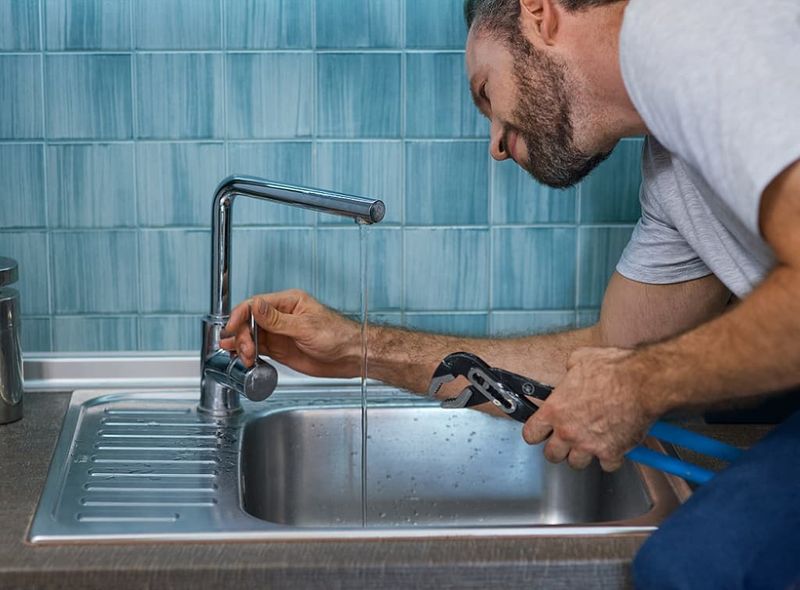
Faucet Leaks
Turn on the faucet and let it run for a minute or two. Watch the base of the faucet and the handles closely. If water starts pooling around the base or dripping from the handles, the faucet is likely the problem. Use a moisture meter for hidden leaks.
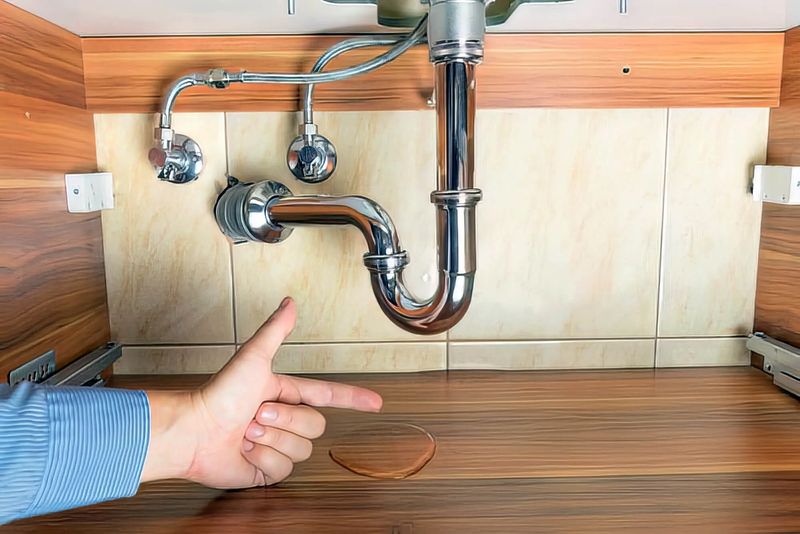
Drain Leaks
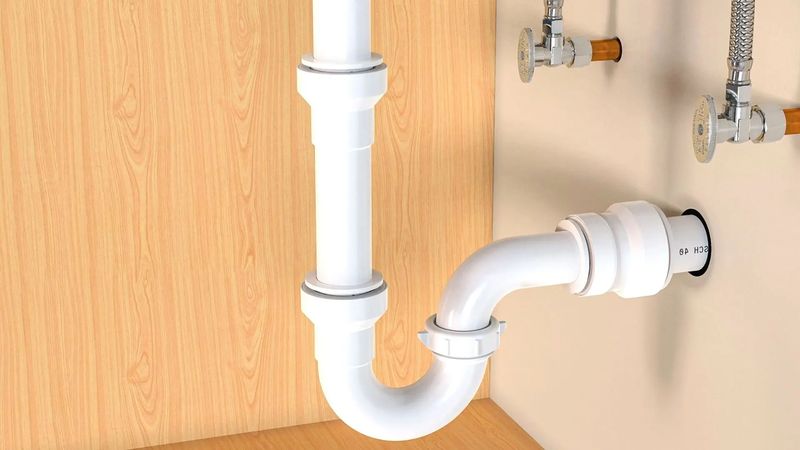
Next, let the water flow down the drain. While it's running, peek under the sink at the drain pipe and the P-trap (that curvy pipe shaped like a "U"). <See P-trap vs S-trap>
If you see water dripping from these areas, the leak is probably in the drain system. Picture a leaky bucket—water slips out before it gets where it's supposed to go.
Pipe Connections
Finally, check the spots where the pipes join together, usually held by nuts or bolts. Run your fingers along these connections (careful if the water's hot!) or look closely for drips.
If it's wet here, the leak might be from a loose or broken connection.
Step-by-Step Guide to Fixing a Leaky Kitchen Sink
Now that you've pinpointed the source of your kitchen sink leak, it's time to fix it! Don't worry—this section will walk you through each step with easy-to-follow instructions.
Fixing Faucet Leaks
A dripping faucet is a frequent annoyance, but it's usually a quick fix. Here's how to stop that leak:
1. Shut Off the Water Supply
First, turn off the water to avoid a mess. Look under the sink for two valves—one for hot water and one for cold. Turn them clockwise until they're fully closed.
If you don't see valves, shut off the main water supply to your home. It's like flipping the main switch before changing a light bulb—safety first!
2. Disassemble the Faucet
Next, take the faucet apart. You'll likely need a screwdriver or wrench, depending on your faucet type (e.g., compression, cartridge, or ball).
Remove the handle, then take out the cartridge or valve stem. Think of it as dismantling a small puzzle—just keep track of how it fits back together. For cartridge faucets, use a valve wrench
3. Replace Worn Parts
Check the washers, O-rings, or cartridges inside. If they're cracked, worn, or brittle, they're probably causing the leak. Replace them with new ones from a hardware store.
These small parts are the unsung heroes keeping your faucet watertight!
4. Cost-Saving Hack
Before buying replacements, try cleaning the old parts with white vinegar. Soak them for an hour to dissolve mineral deposits, which can sometimes cause leaks.
5. Reassemble and Test
Put the faucet back together in reverse order. Once it's reassembled, turn the water supply back on and run the faucet. No drips? Success! If it still leaks, double-check the parts or consider a deeper issue.
Repairing a Leaky Drain Pipe or P-Trap
If water is pooling under the sink, the drain pipe or P-trap (that U-shaped pipe) might be the culprit. Here's how to repair a leaking pipe under a kitchen sink:
1. Place a Bucket Under the P-Trap
Before you start, slide a bucket under the P-trap to catch any water that spills out. It's a simple step that keeps your floor dry—like a safety net for plumbing!
2. Unscrew the Slip-Nuts
The slip-nuts are the threaded connectors holding the P-trap and pipes together. Loosen them by hand or with pliers if they're stubborn. Take it slow—force can damage the setup.
Warning: Don't overtighten plastic pipes later. They can crack under too much pressure, turning a small leak into a big headache!
3. Inspect for Cracks or Misalignment
With the P-trap off, look for cracks, holes, or misaligned pipes. If anything's damaged, replace it. A cracked P-trap can't hold water, which defeats its purpose of blocking sewer gases.
4. Reassemble with Fresh Teflon Tape
Wrap Teflon tape clockwise around the pipe threads before screwing everything back together. This creates a tight seal—like wrapping a present to keep it secure. Reattach the slip-nuts, tighten gently, and check for leaks.
Fixing Drain Leaks
If the leak is right at the sink's drain, it's likely a worn seal. Here's how to seal it up:
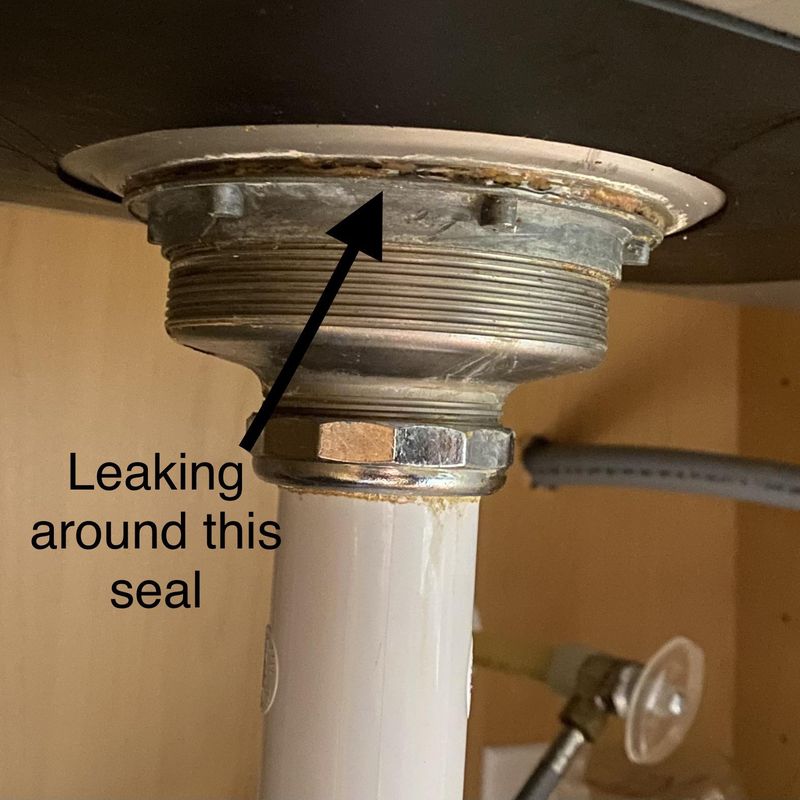
1. Remove the Old Seal
Start by scraping off the old plumber's putty or caulk around the drain with a putty knife. Clear away all the gunk for a fresh surface—it's like peeling off an old label to start anew.
2. Apply New Adhesive
Roll a thin rope of plumber's putty and press it around the drain opening. Alternatively, use silicone caulk for a modern twist. Both act like waterproof glue to stop leaks.
Alternative Tip: Skip the putty and use a rubber gasket instead. It's faster, cleaner, and just as effective—like swapping a messy glue stick for a neat adhesive strip.
3. Replace the Seal
Set the drain back into the sink, pressing it firmly to bond with the putty or caulk. If there's a retaining nut or ring underneath, tighten it to lock the drain in place.
4. Tighten Connections
Snug up all connections under the sink, but don't overdo it—plastic parts can crack. Test by running water. If it holds, you've nailed it! Use a smartphone camera to inspect tight spaces.
Fixing Leaks Around the Sink Base or Countertop
Leaks around the sink base or countertop can sneak up on you and cause big problems if you don't fix them.
These leaks usually happen because the caulk—the waterproof seal between the sink and the counter—gets old, cracks, or peels away. Take a 30-minute fix with our method!
Step 1: Remove Old Caulk
First, you need to take off the old caulk. This is super important because new caulk won't stick well if the old stuff is still there.
- What You'll Need: A utility knife or a caulk removal tool (you can grab these at any hardware store).
- How to Do It: Gently slide the knife or tool along the caulk line where the sink meets the countertop. Go slow and be careful not to scratch the sink or counter. It's like peeling off a label—take your time to get all the old caulk out. If some bits won't budge, don't worry; we'll clean it up in the next step.
Step 2: Clean and Dry the Area
Once the old caulk is gone, it's time to clean the spot where it was. Dirt, grease, or water left behind can stop the new caulk from sticking, so this step is a must.
- Cleaning: Mix some mild detergent (like dish soap) with water and scrub the area with a sponge or small brush. Rinse it well to get rid of any soap.
- Drying: Use a clean, dry cloth to wipe the area completely dry. No moisture should be left behind. If you're in a rush, a hairdryer on low can help—just don't overdo it!
Step 3: Apply New Silicone Caulk
Now it's time to put on the new caulk. We suggest using silicone caulk because it's waterproof and tough, perfect for a kitchen sink.
- How to Apply It: If you're using a caulk gun, put the tube in, cut the tip at a 45-degree angle, and squeeze the trigger to lay down an even line of caulk along the seam between the sink and countertop. It's like drawing a straight line with icing on a cake—nice and smooth!
- Smooth It Out: Use your finger or a caulk smoothing tool to press the caulk into the gap and make it look neat. Wipe off any extra caulk with a damp cloth.
Step 4: Let Cure for 24 Hours
After you've applied the caulk, it needs time to dry and harden. This is called "curing," and it's key to making a strong, leak-proof seal.
- Wait It Out: Let the caulk cure for at least 24 hours before you use the sink. That means no water or dishes for a day. Skipping curing time risks resealing failures.
- Check Later: After it's cured, the caulk should hold up for years. Every few months, peek at it to see if it's cracking or peeling. If it is, just add more caulk to keep things sealed.
Pro Tip: Use Mold-Resistant Caulk in Humid Kitchens
Here's a bonus tip to make your fix even better: always use mold-resistant caulk in your kitchen. Cooking and washing dishes can make the air humid, and that moisture can lead to mold around the sink.
Mold-resistant caulk has special stuff in it to stop mold and mildew, keeping your kitchen fresh and clean.
When to Call a Professional Plumber
Sometimes, a leaky kitchen sink is more than just a small drip—it can be a sign of a bigger problem that needs an expert's touch. While it's great to fix things yourself, there are times when calling a professional plumber is the best choice.
Complex Leaks: When the Problem Is Hard to Find or Fix
Some leaks are tough to figure out. They might be hidden deep in your plumbing system or involve multiple parts that are hard to reach. If you've tried to find the leak but can't, or if the fix feels too complicated, it's time to call a plumber.
Persistent Leaks: When the Leak Keeps Coming Back
Have you fixed a leak, but it keeps dripping no matter what you try? That's a persistent leak, and it might mean there's a bigger problem hiding somewhere. Plumbers can find and fix the real cause so the leak stops for good.
Significant Water Damage or Corroded Pipes: When the Stakes Are High
Per IPC Section 605.4, corroded pipes require professional replacement. If you see big water stains, mold, or soggy wood under your sink, or if your pipes look rusty and old, it's time to call a pro.
These are signs of serious trouble that can get worse quickly.
 Ads
Ads
Stainless Steel Waterfall Kitchen Sink
Here is the Stainless Steel Waterfall Kitchen Sink H02, a sleek and innovative solution for modern kitchens. This kitchen sink with a waterfall design ensures quick and efficient drainage, featuring a sloped surface that prevents water and oil buildup, making cleaning effortless.
Preventing Future Kitchen Sink Leaks
Fixing a leak is awesome, but preventing kitchen sink leaks before they even happen is way better! By doing a few easy things, you can keep your kitchen sink working great and skip the mess of leaks.
Regular Maintenance: Monthly Checks and Annual Resealing
First, make a habit of checking your sink every month. It's super quick! Just peek under the sink for any water, wet spots, or funky mold. If you see anything damp, you can fix it fast before it becomes a giant leak.
Also, reseal your sink once a year. Grab some caulk from the hardware store and put a fresh layer around the sink's edges where it meets the counter. New caulk blocks water from sneaking through and keeps everything dry.
Use Corrosion-Resistant Materials: Avoid Harsh Chemicals
Next, pick materials that don't rust or break down easily. When you're fixing or swapping out parts, choose stainless steel or plastic pipes. These materials fight off corrosion, so they're less likely to leak over time.
Also, skip the harsh chemicals in your sink. Stuff like drain cleaners or bleach can chew up your pipes, kind of like a strong acid-eating metal. Use gentle cleaners instead, like baking soda and vinegar, to keep your pipes happy and healthy.
Avoid Over-Tightening
When you're working on pipes, don't tighten things too hard. It might feel smart to twist those nuts and bolts super tight, but that can cause leaks! Just tighten enough to make a snug fit, like tying your shoelaces. That keeps the pipes safe and leak-free.
Install a Water Softener
Finally, think about getting a water softener, especially if your water is "hard."A water softener works by exchanging calcium and magnesium ions in hard water with sodium or potassium ions. This process, called ion exchange, reduces hardness and prevents scale buildup in pipes and appliances. The softener uses resin beads to carry out the ion exchange process.
Check for Condensation
Sometimes, what looks like a leak is just condensation. Condensation happens when warm air hits cold pipes, making water droplets form on the outside. It's not a leak, but it can fool us!
Here's how to tell the difference:
- Wipe and Wait: After drying the pipes, wait a few minutes without running water. If droplets show up again on their own, it's probably condensation. If the pipes stay dry, any water you saw before was from a real leak.
- Feel the Pipes: Condensation usually forms on cold pipes. If they feel cool and get wet without water running, it's likely just moisture from the air. But if the pipes are warm and still wet, you've got a leak to fix.
FAQs
Below, we tackle five of the most common questions people ask about kitchen sink leaks.
1. Is a kitchen sink leak an emergency?
Not every leak is a red alert, but it's smart to act fast. A small drip might seem harmless, but it can sneak up on you. Over time, it can waste water, hike up your bills, and even cause mold or damage to your cabinets.
If you see a big puddle or water spraying everywhere, that's a bigger deal. Shut off the water and call a plumber right away to stop the flood.
2. What do you need to fix a leaking sink?
Here's what you'll likely need:
- Tools: A wrench, screwdriver, and pliers.
- Materials: Teflon tape, replacement washers or gaskets, and maybe some silicone caulk.
- Extras: A bucket and a flashlight.
3. Will replacing a faucet stop it from leaking?
Sometimes, yes! If the leak is coming from the faucet itself—like from the handle or spout—replacing it might be the fix. But hold on! Sometimes, a simple repair, like swapping out a worn washer, can stop the drip without buying a whole new faucet.
4. Is it better to repair or replace a kitchen faucet?
This depends on a few things:
- Age: If your faucet is old and rusty, replacing it might be smarter. New faucets are shiny and work better!
- Cost: Faucet repair: $20–$150; Replacement: $200–$500.
- Damage: If the faucet is cracked or broken, replacement is the way to go.
Weigh the options: if repairs are quick and cheap, try that first. If not, a new faucet could be a fresh start.
5. Can a leak under the kitchen sink cause water damage?
Yes, it sure can! Water can soak into your cabinets, making them warp or grow mold. It can also drip onto the floor, damaging wood or tiles.

Conclusion
How to fix a leaky kitchen sink? By now, you should feel confident about tackling that pesky leak and keeping your kitchen dry and damage-free.
If you ever need expert advice, top-quality parts, or a professional plumber to provide trusted kitchen sink repair services, Jabra kitchen sink supplier is your go-to choice. With years of experience and a reputation for reliability, we're here to make sure your plumbing stays in tip-top shape.
More Reading


Request Free Quote Today!
Jabra Sanitary is a manufacturer of high-quality sanitary ware based on innovative technology. We are always ready to help with your building and infrastructure projects.
Please leave your contact details below, and we'll get back to you within 8 business hours to discuss your needs.
Stay Updated With Our Latest News & Products
© 2025 Jabra Sanitary Ware. All Rights Reserved.
Products
Contact Info
-
 inquiry@jabrasanitary.com
-
 +8613829077699
-
 +8613829077699
-
 No. 1, Zhenxing Road,
Chaoan District, Chaozhou City,
Guangdong Province, China