English

How to Install or Replace a Kitchen Sink
May 13, 2025
Post Views: 2287


Jabra Sanitary is a sanitaryware supplier offering toilets, sinks, faucets, bathtubs, etc., at competitive prices. If you're a distributor, wholesaler, or project contractor, get a quote today!
 $23.9 Limited-time Offer
- Consignment Policy
- 20 Years of Experience
Picture this: you walk into your kitchen, ready to whip up a meal, and there's water dripping from your old sink again. Annoying, isn't it? Or maybe you've been eyeing a shiny new sink that could give your kitchen a fresh, modern vibe.
Whatever's driving you, we're here to tell you that installing or replacing a kitchen sink is a project we can tackle together!

Table of Contents
Tools & Materials You'll Need
Removing the Old Kitchen Sink: Step-by-Step
Preparing the Countertop for New Kitchen Sink
How to Install a New Kitchen Sink: The Process
Common Mistakes to Avoid in Installing Kitchen Sinks
When to Hire a Professional for Replacing a Kitchen Sink
Maintenance Tips After Kitchen Sink Installation
FAQs
Final Thoughts
Tools & Materials You'll Need
Before you examine how to install a new kitchen sink, we need to make sure you've got all the right tools and materials on hand. Plus, it's always better to be prepared than to scramble for a missing wrench when you're elbow-deep in plumbing!
General Tools & Materials
No matter what type of sink you're installing, these are the must-haves:
Safety Gear: Gloves, safety glasses, and a mask to keep you protected.
Measuring Tape: For precise measurements of your sink and countertop.
Pencil or Marker: To mark where you'll be cutting or drilling.
Level: Ensure your sink sits perfectly even.
Drill with Various Bits: For making holes in the countertop or cabinet.
Jigsaw or Reciprocating Saw: To cut the countertop for the sink opening.
Caulk Gun: For applying silicone caulk or adhesive.
Silicone Caulk: To seal the sink and prevent leaks.
Plumber's Putty: For sealing the drain and faucet (but check if your sink material allows it—more on that later!).
Pipe Wrench: For tightening and loosening plumbing connections.
Adjustable Wrench: Handy for various nuts and bolts.
Screwdrivers (Flathead and Phillips): For securing clips or mounting hardware.
Utility Knife: To cut through old caulk or sealant.
Bucket: To catch any water when disconnecting the plumbing.
Towels or Rags: For wiping up spills or drying surfaces.

Specific Tools & Materials for Different Sink Types
Depending on the type of sink you're installing, you might need a few extra items:
For Drop-In Sinks:
- Sink clips
- Sink mounting hardware (usually comes with the sink)
For Undermount Sinks:
- Under-mount sink clips
- Epoxy or adhesive (for securing the sink to the countertop)
For Farmhouse Sinks:
- Support brackets
- Wood screws (for securing the brackets)
 Ads
Ads
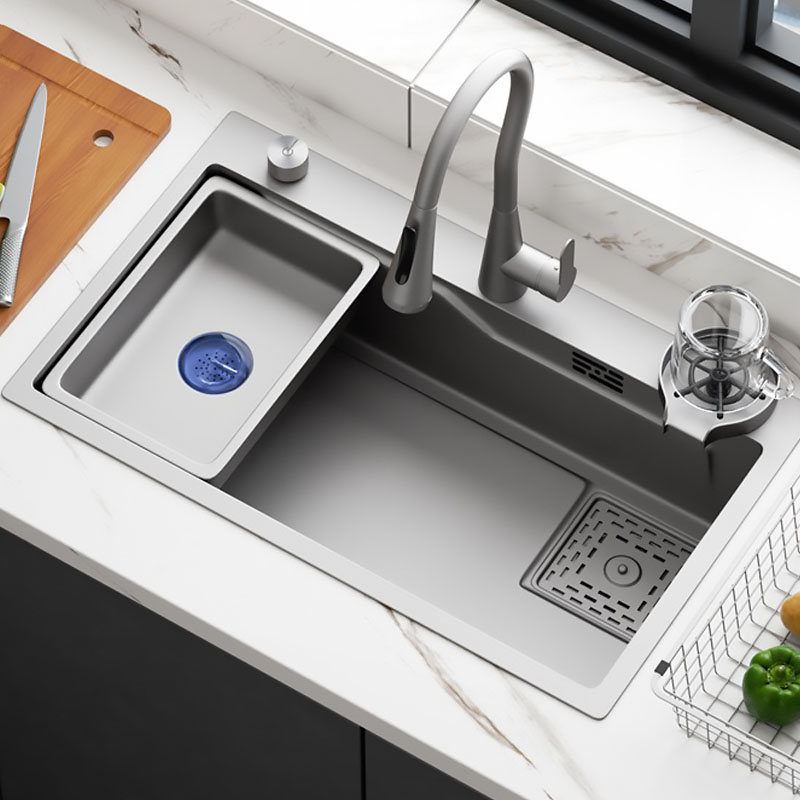
Undermount Workstation Kitchen Sink
The undermount workstation sink manufacturer H03 is designed for ultimate versatility and efficiency. This workstation sink undermount allows you to seamlessly switch between cutting meat and washing vegetables without cross-contamination.
Optional Tools & Materials
These aren't strictly necessary, but they can make your life easier:
- Sink Installation Template: Some sinks come with a template to help you mark the exact cutout size—super helpful for precision.
- Sink Grid: Protects your new sink from scratches and dents.
Removing the Old Kitchen Sink: Step-by-Step
Before you can install a new kitchen sink, you need to remove the old one.
Whether your old sink is rusted, leaking, or just ready for retirement, these steps will help you take it out safely and efficiently. Always keep a bucket and towels nearby to catch water.

Step 1: Shut Off the Water and Disconnect the Supply Lines
Start by cutting off the water supply to keep things dry:
- Find the shut-off valves under the sink—one for hot water, one for cold.
- Turn both valves clockwise until they're fully closed.
- Grab an adjustable wrench and disconnect the supply lines from the faucet. Keep a towel or small bucket handy for any drips. Use a basin wrench for tight spaces.
Step 2: Drain the Remaining Water
There might still be water in the lines, so let's clear it out:
- Place a bucket under the sink to catch any runoff.
- Open the faucet and let the water drain until it stops.
Step 3: Disconnect Your Disposal and the Dishwasher (If Applicable)
If your sink has a garbage disposal or dishwasher, handle them next:
- Garbage Disposal: Unplug it or turn off the circuit breaker if it's hardwired. Loosen the clamp connecting it to the sink drain with a wrench.
- Dishwasher: Find the drain hose (usually attached to the disposal or drain pipe) and loosen the clamp with a screwdriver to disconnect it.
- Safety Note: Double-check the power is off before touching the disposal.
Step 4: Detach the Drain and P-Trap Pipes
Now, tackle the plumbing underneath:
- Position a bucket under the P-trap (the U-shaped pipe) to catch water or gunk.
- Use a pipe wrench or adjustable wrench to loosen the nuts on the drain pipes.
- Remove the P-trap carefully—it might need a gentle wiggle to come loose.
Step 5: Unscrew the Sink Clips and Cut the Caulk
Time to free the sink from the countertop:
- Check underneath for clips securing the sink. Unscrew them with a screwdriver.
- Use a utility knife to cut through the caulk or sealant around the sink's edge. Take your time to avoid scratching the counter.
Step 6: Remove the Old Sink and Scrape Off Any Caulk
With clips off and caulk cut, lift the sink out of the countertop. Get help if it's heavy (like cast iron).
Use a putty knife to scrape off any leftover caulk or adhesive from the counter for a clean slate.
Preparing the Countertop for New Kitchen Sink
Before we can install a kitchen sink, we need to make sure the countertop is ready.
A well-prepared countertop ensures your sink fits perfectly, looks great, and doesn't cause any leaks or damage down the road. Plus, it makes the installation process smoother and less stressful.
Step 1: Clean the Countertop
First things first, we need to remove any old caulk, adhesive, or debris from the area where the sink will go. This ensures a smooth surface for your new sink.
What You'll Need:
- Putty knife
- Cleaner (like rubbing alcohol or a mild detergent)
- Clean cloth or sponge
How to Do It:
- Use the putty knife. Be careful not to scratch the countertop.
- Wipe the area with a cleaner to remove any remaining residue.
- Dry the surface with a clean cloth.
Step 2: Measure the Sink Cutout
Next, we need to measure the area where the sink will be installed. This is crucial for a perfect fit.
What You'll Need:
- Measuring tape
- Pencil or marker
- Sink template (if provided)
How to Do It:
- If your sink comes with a template, place it on the countertop and trace the outline with a pencil.
- If there's no template, measure the sink's dimensions and mark the cutout area on the countertop. Remember to account for the sink's lip or any overhang.
- Double-check your measurements to ensure accuracy.
Step 3: Special Prep for Undermount Sinks
If you're installing an under-mount sink, there are a few extra steps to consider. These sinks are mounted from below, so the countertop needs to be cut precisely.
What You'll Need:
- Jigsaw or reciprocating saw
- Sandpaper or file
How to Do It:
- After marking the cutout, use a jigsaw or reciprocating saw to carefully cut along the lines.
- Smooth the edges of the cutout with sandpaper or a file to remove any rough spots.
- Consider adding support brackets if your sink is heavy, like a cast iron model.
How to Install a New Kitchen Sink: The Process
Welcome to the heart of your kitchen sink project—installation day! Whether you're upgrading your space or tackling your first DIY plumbing job, we've got you covered with a detailed, easy-to-follow guide.
Step 1: Measuring and Marking the Sink Opening
Accuracy is your best friend here. Let's get those measurements spot-on.
Tools You'll Need:
- Measuring tape
- Pencil or marker
- Sink template (if included)
Instructions:
- If your sink came with a template, align it on the countertop and trace the outline.
- No template? Measure the sink's width, length, and lip (if applicable), then mark the cutout area on the countertop.
- Double-check your marks—precision now saves trouble later.
Step 2: Cutting the Countertop for the Sink Installation
Time to make space for your sink. Take it slow and steady.
Tools You'll Need:
- Drill with a hole saw a bit
- Jigsaw or reciprocating saw
- Painter's tape
Instructions:
- Apply painter's tape along your marked lines to minimize countertop chipping.
- Drill a starter hole just inside the outline.
- Carefully cut along the lines of your jigsaw.
- Sand down any rough edges for a clean finish.
Step 3: Pre-mounting the Faucet on the Sink
Tools You'll Need:
- Faucet
- Plumber's putty or silicone caulk
- Adjustable wrench
Instructions:
- Apply a thin ring of plumber's putty or caulk around the faucet's base or mounting holes.
- Slide the faucet into the sink's pre-drilled holes.
- Secure it from underneath with the mounting nuts, tightening gently with your wrench. Tighten nuts to 25-30 ft-lbs.
Step 4: Installing the Sink Basin into the Countertop
Here's where your sink starts to feel at home.
For Drop-In Sinks:
- Carefully lower the sink into the cutout.
- Ensure the lip sits evenly on the countertop all around.
For Undermount Sinks:
- Apply silicone caulk or adhesive to the countertop's underside along the cutout edge.
- Lift the sink into place from below, pressing it firmly against the countertop.
Step 5: Securing the Sink and Sealing the Edges
Lock it in and keep water out—this step's all about stability and sealing.
For Drop-In Sinks:
- Attach sink clips evenly around the underside (usually provided with the sink).
- Tighten the clips with a screwdriver—just snug, not super tight.
For Undermount Sinks:
- Use under-mount clips or brackets to hold the sink against the countertop.
- Run a bead of silicone caulk around the sink's edge where it meets the countertop for a watertight seal.
Step 6: Connecting the Faucet and Water Supply Lines
Let's bring water into the picture.

Tools You'll Need:
- Flexible supply lines
- Adjustable wrench
- Teflon tape
Instructions:
- Wrap Teflon tape clockwise around the threads of the supply line connectors.
- Attach the lines to the faucet and shut-off valves.
Step 7: Installing the Drain Assembly and Garbage Disposal (If Applicable)
Here's how to set them up.
For the Drain:
- Roll the plumber's putty into a rope and press it around the drain flange.
- Insert the flange into the sink's drain hole.
- From below, add the rubber gasket, washer, and nut.
For the Garbage Disposal (if using):
- Mount the disposal to the sink per the manufacturer's guide.
- Connect it to the drain pipe with the provided hardware.
Step 8: Testing for Leaks: Don't Skip This!
Better to catch a drip now than mop up a flood later.
Instructions:
- Turn on the water supply slowly.
- Run the faucet and watch for leaks at all connections.
- Check the drain and disposal (if installed) for any water escaping.
Step 9: Turn On the Power to the Garbage Disposal and Dishwasher
If you've got powered appliances, it's go-time.
Instructions:
- Plug in the garbage disposal or flip its circuit breaker on.
- Reattach the dishwasher drain hose if disconnected.
- Test both to confirm they're running smoothly.
Pro tip: Use an adjustable wrench for all plumbing connections, ensuring snug but not over-tightened fittings.
Common Mistakes to Avoid in Installing Kitchen Sinks
Disconnecting a kitchen sink can feel like a big win—until a small mistake turns into a headache later on. But don't worry, we're here to help you sidestep those pitfalls.

1. Using Plumber's Putty on Composite Sinks
What's the issue? Plumber's putty is perfect for stainless steel sinks, but it can stain composite materials like granite or quartz. Those stains are tough to remove and can ruin your sink's look.
How to avoid it: Never use plumber's putty on composite sinks—see Section 8 for alternatives.
2. Overtightening PVC Connections
What's the issue? Tightening PVC pipes too much can cause them to crack, leading to leaks that might not show up right away. You could be facing a mess in just a few months.
How to avoid it: Hand-tighten the connections first, then give them an extra quarter turn with a wrench. If you're worried about leaks, wrap the threads with Teflon tape for a secure fit without overdoing it.
3. Ignoring Countertop Slope
What's the issue? If your countertop isn't level, water can pool around the sink instead of draining properly. Over time, this can damage your counter or cabinet.
How to avoid it: Before installing the sink, use a level to check the countertop's slope. If it's not even, adjust it so water flows toward the sink.
When to Hire a Professional for Replacing a Kitchen Sink
Replacing a kitchen sink can be a rewarding DIY project, but sometimes it's smarter to let a professional handle the job.
Not everyone has the time, tools, or confidence to tackle plumbing and installation work—and that's perfectly fine!

1. Complex Plumbing Issues
If your kitchen sink project involves more than just swapping out the sink, it might be time to call in a pro.
Here's why:
- Existing Plumbing Problems: If your current setup has leaks, clogs, or outdated pipes, a professional can fix these issues while installing your new sink.
- Significant Plumbing Changes: Installing a new sink might require rerouting pipes or adding new connections (like for a dishwasher or garbage disposal). A pro ensures everything is up to code and works seamlessly.
2. Structural Modifications Needed
Sometimes, a new sink means making changes to your countertop, cabinets, or even the kitchen layout. This is where a professional's skills shine:
- Countertop Alterations: If your new sink requires a different cutout size or material adjustments (like switching from laminate to stone), a pro can handle the precision work without damaging your countertop.
- Cabinet Adjustments: Some sinks, like farmhouse styles, might need cabinet modifications for proper support. A professional can reinforce or adjust the cabinets to ensure your sink is secure.
3. Lack of Experience or Confidence
If you're feeling unsure, it's better to hire a pro than to risk a mistake. Here's when to consider it:
- First-Time Installer: If you've never installed a sink before, the process can be intimidating. A professional can guide you through the project or take it off your hands entirely.
- Unfamiliar with Tools: Sink installation requires specific tools and skills. If you're not comfortable with a jigsaw, wrench, or caulking gun, a pro can step in. Look for licensed plumbers with ANSI/IAPMO credentials.
4. Time Constraints
Life gets busy, and sometimes you just don't have the time to dedicate to a full sink replacement. Here's why hiring a pro makes sense:
- Quick Turnaround: What might take you a weekend could be done in a few hours by an experienced installer.
- Minimal Disruption: A professional can work efficiently, reducing the time your kitchen is out of commission.
Maintenance Tips After Kitchen Sink Installation
Regular maintenance doesn't have to be complicated—with just a few simple habits, you can ensure your sink stays clean, clog-free, and in great condition.
1. Keep It Clean: A Simple Routine for a Sparkling Sink
Your kitchen sink works hard every day, so a little care goes a long way. Here's an easy cleaning routine to keep it spotless:
- Daily Wipe-Down: After each use, wipe the sink with a soft cloth or sponge and mild dish soap. This stops grease and food particles from building up.
- Rinse and Dry: Rinse with warm water and dry the sink with a clean towel to avoid water spots or mineral deposits.
- Weekly Deep Clean: Once a week, use a non-abrasive cleaner (safe for your sink's material) and a soft brush to tackle any stubborn marks.
2. Prevent Clogs: Keep the Drain Flowing Smoothly
No one wants to deal with a clogged sink. Here's how to keep the drain clear:
- Use a Drain Strainer: Place a strainer over the drain to catch food scraps, hair, or debris before they clog the pipe.
- Run Hot Water: After each use, run hot water for a few seconds to flush out grease or residue.
- Avoid Grease Buildup: Don't pour grease or oil down the drain—let it cool and toss it in the trash instead.
3. Check for Leaks: Catch Problems Early
A small leak can become a big headache if ignored. Here's how to stay ahead of it:
- Inspect Regularly: Every few months, peek under the sink for moisture, drips, or water stains.
- Tighten Connections: If you spot a leak, gently tighten the connections with a wrench—but don't overdo it, as that can cause damage.
- Replace Worn Parts: Swap out any worn washers or seals as soon as you notice wear to stop leaks in their tracks.

4. Care for Your Sink's Material: Prevent Scratches
Different sink materials need specific care to stay in top shape. Here's how to handle the most common types:
Stainless Steel Sinks:
- Clean with a soft cloth or sponge.
- Avoid abrasive scrubbers or steel wool—they'll scratch the surface.
Composite Sinks (Granite, Quartz, etc.):
- Use a non-abrasive cleaner and a soft brush.
- Avoid sudden temperature changes to prevent cracks.
Porcelain or Ceramic Sinks:
- Clean with mild soap and water.
- Don't drop heavy objects—they can chip the surface.
FAQs
We've put together this FAQs section to address the questions we hear most often.
How to secure an undermount sink?
Securing an under-mount sink means attaching it to the bottom of your countertop.
First, you'll spread a line of silicone caulk around the sink's edge to stop water from leaking. Next, place the sink under the countertop opening and fasten it with the clips or brackets.
Can I put a deeper sink in my kitchen?
Yes, you can add a deeper sink to your kitchen, but there are a couple of things we suggest checking first.
Look inside your cabinet to see if there's enough space for the bigger sink and the pipes that come with it. Sometimes, you might need to tweak the plumbing or adjust the cabinet to fit everything.
What is the easiest kitchen sink to install?
We find that drop-in sinks are the easiest to install. These sinks have a rim that rests on top of the countertop, so you don't need to cut the counter perfectly.
All you do is make a hole a bit smaller than the sink's rim, set the sink in place, and lock it down with clips.
How long does it take to install a kitchen sink?
For a simple drop-in sink swap, we'd say it takes about 2 to 4 hours. But if you're putting in an undermount sink or working with a custom countertop, it might take more time.
What is the average labor cost to install a kitchen sink?
The average labor cost to install a kitchen sink usually falls between $250 and $600, based on where you live and what the job involves.
Can you replace a kitchen sink without removing the countertop?
In lots of cases, yes. This works best if the new sink is the same size or smaller than the old one and is a drop-in type.
Do I need any special tools to install a kitchen sink?
You don't need fancy tools, but having the right ones makes the job smoother. If you're cutting the countertop, a jigsaw or circular saw might come in handy. For undermount sinks, you'll need the clips or brackets that match.

Final Thoughts
Transform your kitchen with confidence—here's how!
When it comes to picking the perfect sink and making sure it's installed just right, Senhang Sanitary (EPA-certified, 20+ years in plumbing) is the best choice. We offer a wide range of stylish and durable sinks that fit any kitchen design. Plus, our team of experts provides top-notch installation services.
More Reading


Request Free Quote Today!
Senhang Sanitary is a manufacturer of high-quality sanitary ware based on innovative technology. We are always ready to help with your building and infrastructure projects.
Please leave your contact details below, and we'll get back to you within 8 business hours to discuss your needs.
Stay Updated With Our Latest News & Products
© 2026 Senhang Sanitary Ware. All Rights Reserved.
Products
Contact Info
-
 inquiry@jabrasanitary.com
-
 +8613829077699
-
 +8613829077699
-
 No. 1, Zhenxing Road,
Chaoan District, Chaozhou City,
Guangdong Province, China