English

How To Remove & Replace a Bathtub: A Step-by-Step Guide
May 12, 2025
Post Views: 2299


Jabra Sanitary is a sanitaryware supplier offering toilets, sinks, faucets, bathtubs, etc., at competitive prices. If you're a distributor, wholesaler, or project contractor, get a quote today!
 $23.9 Limited-time Offer
- Consignment Policy
- 20 Years of Experience
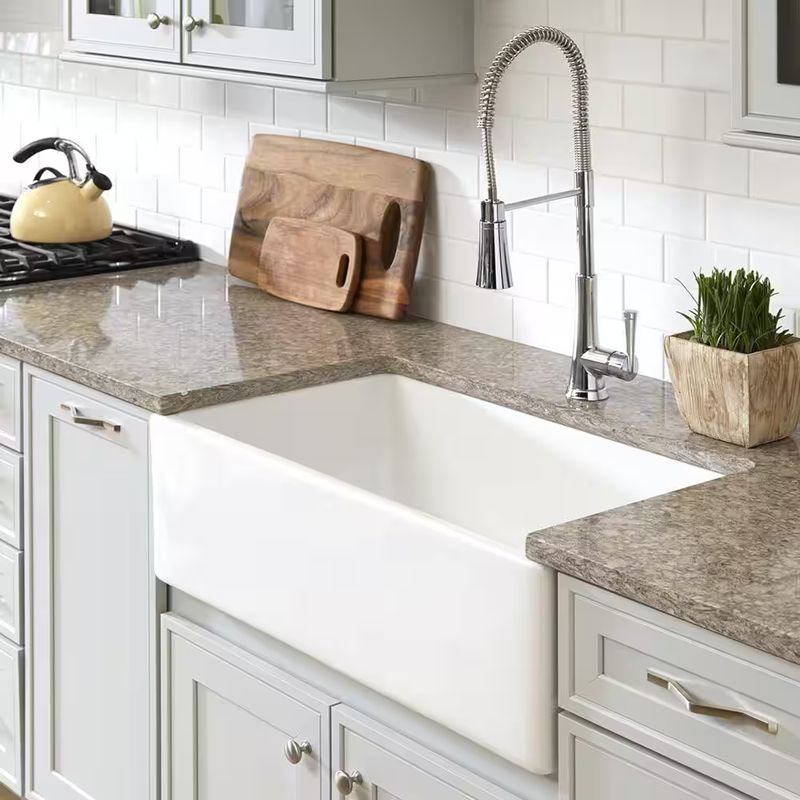
Changing a bathtub is a rewarding project that can breathe new life into your bathroom. We've put together a comprehensive roadmap to make the process as smooth as possible, covering everything from spotting the signs that it's time for a change to adding those final finishing touches.
According to the National Association of Realtors, a new bathtub can transform your bathroom's look, boost your home's value, and even make your daily routine safer and more enjoyable—pretty exciting, right?
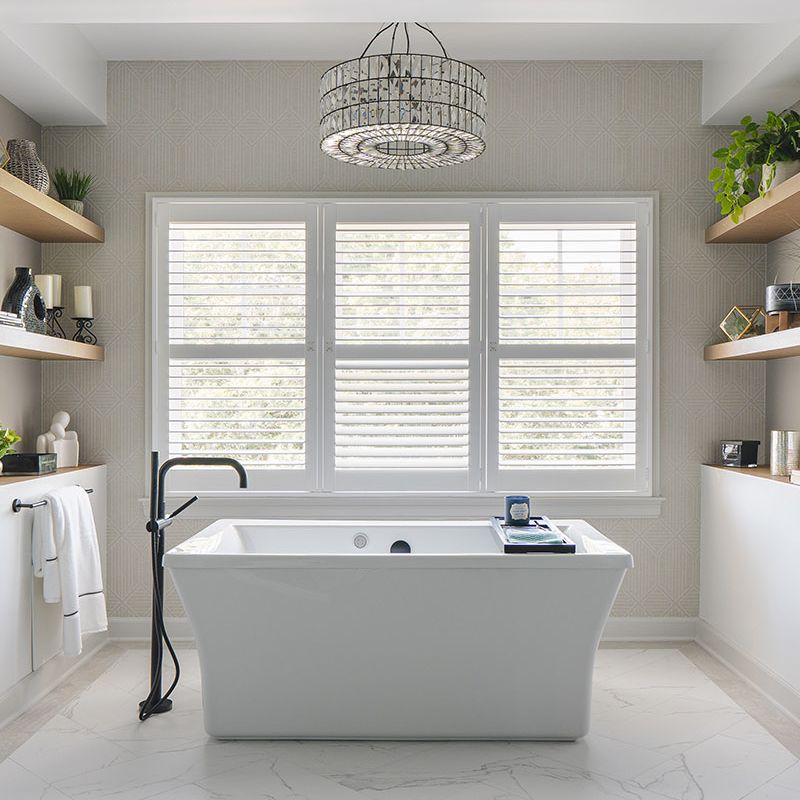
Table of Contents
Signs It's Time To Replace Your Bathtub
Safety First: Precautions Before Starting Your Project
Tools and Materials You'll Need
Step-by-Step Guide to Removing the Old Bathtub
Preparing the Space for the New Bathtub
Step-by-Step Guide to Installing the New Bathtub
Finishing Touches
Dealing with Unexpected Issues
Choosing the Right Replacement Bathtub
Hire a Professional vs. DIY Bathtub Replacement
Cost Breakdown: What to Budget
Common Mistakes to Avoid When Replacing a Bathtub
Maintenance Tips for Your New Bathtub
FAQs About Removing and Replacing a Bathtub
Conclusion
Signs It's Time To Replace Your Bathtub
Is your bathtub showing its age? Knowing when to replace it can save you from headaches down the road.
Structural and Water Damage Signs
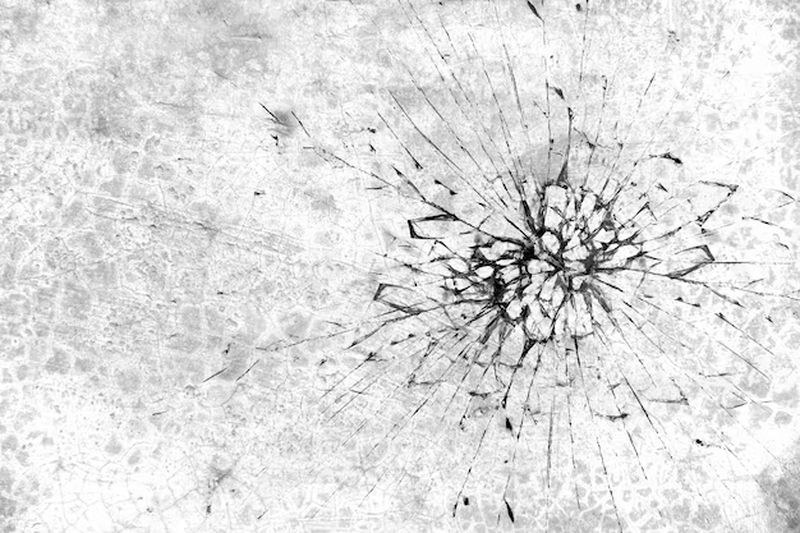
Have you noticed cracks or stubborn stains on your bathtub? Cracks allow water to seep through, potentially damaging the floor or walls underneath.
A 1/8-inch crack can leak 50 gallons of water annually. Per ASTM International, cracks deeper than 0.5mm require replacement.
Stains, especially deep or widespread ones, often mean the tub's material is wearing out. If cleaning doesn't fix the problem or cracks keep growing, it's a strong hint that replacement is the next step.
Persistent leaks can lead to mold growth and serious damage that's expensive to repair.
Outdated Style or Poor Functionality
An outdated style can make your whole bathroom look old-fashioned. Beyond looks, if the tub doesn't work for you—maybe it's too small, lacks modern features like jets, or is tough to climb into—it's not doing its job.
Lack of Usage
Is your bathtub sitting unused, collecting dust instead of water? That's a clue it's not meeting your needs. Maybe it's too big for your space, or you'd rather have a shower for quick mornings. A tub that doesn't fit your lifestyle is just taking up room.
Safety First: Precautions Before Starting Your Project
Taking on a bathtub removal project can be exciting, but safety should always come first.
Turning Off Water and Electricity
Before you touch anything, make sure to shut off the water and electricity to your bathroom.
Water: Locate the main water valve (usually near the water heater or outside) and turn it off. Then, open the bathroom faucets to drain any remaining water.
Electricity: Switch off the power to the bathroom at your circuit breaker. If you're not sure which breaker controls the bathroom, consider turning off the main power to be extra safe.
Protective Gear (Gloves, Goggles, Respirators)
Gloves: Thick, durable gloves protect your hands from sharp edges, rough surfaces, and any chemicals you might use.
Goggles: Safety goggles shield your eyes from dust, debris, and flying particles, especially when cutting or breaking materials.
Respirators: If you're dealing with mold, dust, or strong adhesives, a respirator or mask will help you breathe easily and avoid inhaling harmful particles.
Handling Sharp Edges and Heavy Materials
Bathtub removal involves dealing with sharp tools and heavy objects, so it's important to handle them with care.
Sharp Edges: Old bathtubs, especially metal ones, can have jagged edges once broken or cut. Always use caution when handling them, and consider wearing long sleeves for extra protection.
Heavy Materials: Bathtubs are heavy—cast iron ones can weigh over 300 pounds! If you're lifting or moving the tub, ask for help or use tools like dollies or straps to avoid straining your back.
Pro tip: If the tub is too heavy, don't hesitate to break it into smaller pieces (safely, of course) to make removal easier.
Tools and Materials You'll Need
Before you dive into removing and replacing your bathtub, it's essential to gather all the right tools and materials. Having everything on hand will make the process smoother and help you avoid frustrating trips to the hardware store mid-project.
Essential Tools
These are the tools you'll rely on to safely and effectively remove your old bathtub:
- Crowbar: Perfect for prying the old tub away from the wall without damaging the surrounding area.
- Reciprocating Saw: This handy saw cuts through tough materials like metal or thick plastic, making it easier to break down the tub if needed.
- Utility Knife: Use this to slice through caulk or sealant around the tub's edges, helping you loosen it from the floor and walls.
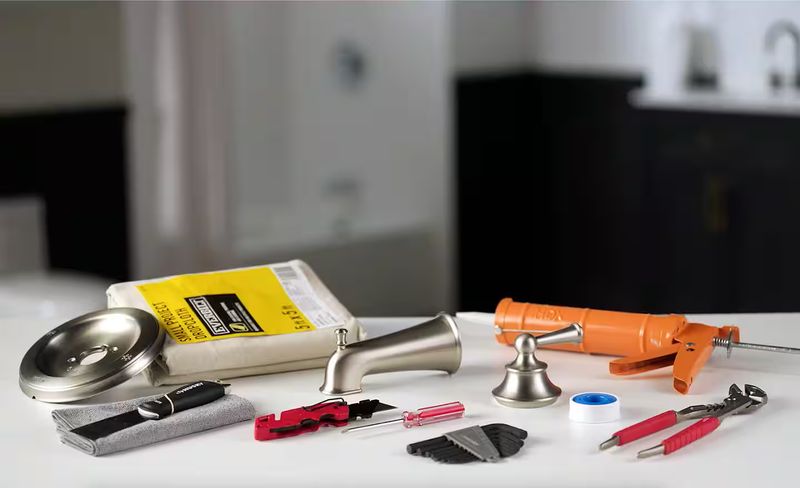
Materials
Here's what you'll need to install your shiny new bathtub:
- New Bathtub: Make sure it's the right size and style for your space. (We'll dive deeper into choosing the perfect tub in Section 10.)
- Plumbing Supplies: This includes pipes, fittings, and connectors to hook up the new tub's drain and overflow.
- Sealant (Caulk or Silicone): Essential for creating a watertight seal around the tub's edges. Use NSF/ANSI-certified sealants.
 Ads
Ads
Large Deep Soaking Bathtub Manufacturer
Here is the Large Deep Soaking Bathtub Manufacturer Y04, designed to elevate your bathing experience with unmatched comfort and style. The large soaking tub features an ergonomic backrest with a curved design, ensuring a relaxing and supportive soak that aligns perfectly with your body's natural contours.
Optional Equipment for Complex Removals
Sometimes, changing a bathtub can be a bit trickier, especially if it's cast iron or surrounded by tile. Here are some extra tools that might come in handy:
- Angle Grinder: For thick cast iron screws
- Pry Bars: These provide extra leverage when trying to lift or shift a heavy tub.
Step-by-Step Guide to Removing the Old Bathtub
Changing a bathtub might sound intimidating, but with the right steps, it's doable!
Disconnect the Drain
First, you need to disconnect the drain to free the bathtub from the plumbing.
- Locate the drain: Look under the tub or through an access panel in an adjacent room.
- Remove the drain stopper: Use a screwdriver or pliers to unscrew the stopper or linkage.
- Detach the drain flange: Use a drain wrench or pliers to loosen and remove the flange from the tub's drain hole.
Pro tip: If the drain is stuck, apply penetrating oil and let it sit for a few minutes to loosen rust or grime.
Disconnect the Drain Assembly
Now, fully disconnect the drain assembly to separate the tub from the plumbing system.
- Access the overflow: Find the overflow plate (usually below the spout) and unscrew it.
- Remove the waste-and-overflow: Use a wrench to detach the waste-and-overflow pipe from the drain line.
- Cap the pipe: Temporarily cover the open drainpipe to prevent debris from falling in.
Tips: If the drain flange is stuck, use a heat gun.
Remove the Tub Spout
Next, take off the tub spout to avoid damaging it or the plumbing.
- Check the spout type: Some spouts unscrew, while others are held by a set screw.
- Unscrew or loosen: Use a screwdriver for set screws or twist the spout counterclockwise if it's threaded.
- Clean the area: Wipe away any old caulk or debris around the spout area.
Remove Your Old Tub from the Wall
With the plumbing disconnected, it's time to free the tub from the walls.
- Cutaway caulk: Use a utility knife to slice through any caulk or sealant along the tub's edges.
- Remove the surround: If your tub has a tile or panel surround, carefully pry it off with a crowbar or remove tiles with a hammer and chisel.
- Check for screws: Look for any screws or nails securing the tub to the wall studs and remove them with a screwdriver or drill.

Break Down and Remove the Bathtub
Some bathtubs, especially heavy cast iron ones, may need to be broken down for removal.
- Assess the tub: If it's lightweight (like fiberglass), you might lift it out whole. For heavy tubs, breaking it up is safer.
- Break it safely: Use a sledgehammer to carefully break cast iron tubs into smaller pieces. Wear goggles and gloves for protection.
- Lift it out: With a helper, carry the tub or its pieces out of the bathroom. Use a dolly for heavy loads to avoid injury.
Dispose of the Old Tub
Getting rid of the old bathtub is an important step to clear your workspace.
- Check local rules: Contact your local sanitation or recycling center to see if they accept bathtubs.
- Recycle if possible: Many metal tubs can be recycled, saving landfill space.
- Hire a service: If disposal is tricky, consider a junk removal service for convenience.
Clean the Workspace and Inspect for Hidden Damage
- Clear debris: Sweep or vacuum dust, broken tiles, or caulk scraps from the area.
- Inspect the floor and walls: Look for water damage, mold, or weak spots that need repair.
- Fix minor issues: Patch small holes or replace damaged drywall to ensure a solid base for the new tub.
Preparing the Space for the New Bathtub
Now that your old bathtub is out, it's time to get the space ready for the new one. Proper preparation ensures your new bathtub fits perfectly, stays secure, and lasts for years.
Leveling the Floor and Reinforcing the Subfloor
A level and sturdy floor is critical for your new bathtub to sit properly and avoid issues like wobbling or leaks.
- Check for level: Use a level to see if the floor is even. Uneven floors can cause the tub to tilt, leading to water pooling or cracks.
- Fix uneven spots: Apply a floor leveling compound for small dips, as suggested by Handyman Startup. For larger issues, you may need to add shims or replace damaged subflooring.
- Reinforce the subfloor: Ensure the subfloor can handle the tub's weight, especially for heavy cast iron models. Add extra plywood or 2x4 supports if needed, as noted in Better Homes & Gardens.
- Clean the area: Sweep away dust or debris to create a smooth surface for the new tub.
Installing Moisture Barriers or Cement Board
Protecting your walls and floor from water damage is a must to keep your bathroom in top shape.
Install moisture-resistant cement board using screws and seal seams. Per TCNA guidelines, use a 1/4-inch cement board for wet areas.
Use screws to fasten the cement board to wall studs, and seal seams with waterproof tape or caulk. Make sure there are no openings where water could seep through.
Adjusting Plumbing for the New Tub's Layout
Your new bathtub might have a different drain or overflow position, so adjusting the plumbing is often necessary.
- Measure the new tub's drain: Compare its drain location to the existing plumbing, as advised by GVD Renovations.
- Modify pipes if needed: Use PVC or copper pipes to extend or reposition the drain line. A hacksaw and pipe fittings can help, but ensure tight connections to avoid leaks.
- Check the overflow: Confirm the overflow pipe aligns with the new tub's overflow hole. Adjust its height or angle if necessary.
- Fit test: Dry-fit the tub to ensure the plumbing lines up before securing anything permanently.
Step-by-Step Guide to Installing the New Bathtub
Now that we've removed the old bathtub and prepped the space, it's time to install the new one. This part might feel like a big step, but don't worry—we're here to walk you through it.
Position the New Tub
First, we need to carefully place the new tub into the alcove or spot where the old one sat. Slide it in gently, ensuring it fits snugly against the walls.
Tip: Grab a level to check that the tub sits evenly. If it's not level, water might pool in one spot later, which could cause leaks or uneven wear. Adjust it until it's just right.
Secure the Tub to the Studs
Once the tub's in place, let's lock it down. Use screws or nails to attach it to the wall studs. This keeps the tub from shifting when we step in or out.
Double-check that it's still level before tightening everything up. A steady tub means a safer bathroom for us all.
Install the New Bath Waste and Overflow
Next, we'll tackle the bath waste and overflow—the parts that let water drain out. Follow the instructions that came with the tub to hook these up right. Use food coloring in water to trace leaks.
Connect the Drain
Now, let's connect the drain to the tub's waste outlet. Line it up carefully and secure it according to the manufacturer's guide. This step sets the stage for smooth drainage, so we want it snug and solid.
Install the P-Trap
After the drain's connected, we'll add the P-trap. This is a curved pipe that stops sewer gases from sneaking into our bathroom.
It's shaped like a "P" on its side—pretty clever, right? Attach it below the drain, making sure it's tight but not forced.
Make a Watertight Connection
Leaks are no fun, so let's seal things up. Use the plumber's putty or silicone sealant around the drain and overflow connections. Spread it evenly to block any water from escaping.
Tip: Apply plenty of sealant, then smooth it out for a clean, tight fit. This keeps our bathroom dry and damage-free.
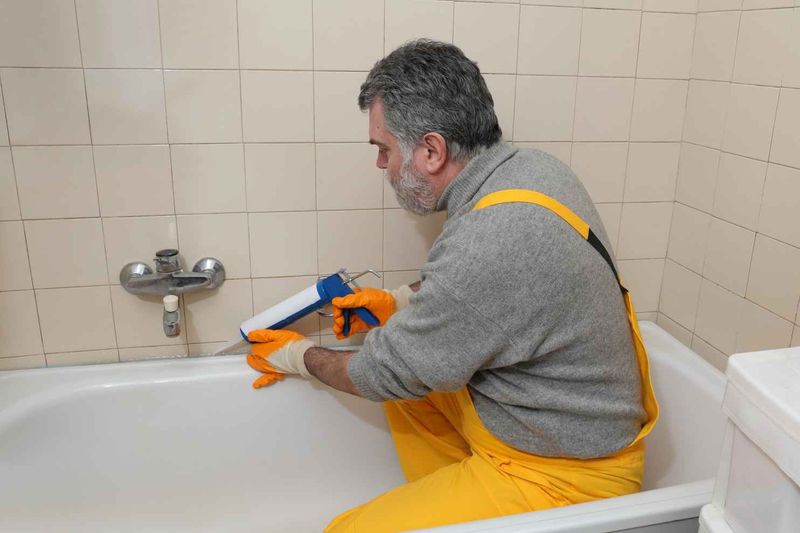
Seal Edges with Waterproof Caulk or Silicone
To finish the look and keep water out, run a bead of waterproof caulk or silicone where the tub meets the walls.
Tip: Be generous here, but use a finger or tool to smooth it into a neat line. This not only seals gaps but also gives our tub a polished edge.
Test for Leaks and Stability
Before we call it done, let's test our work. Fill the tub with water and watch for leaks around the drain and overflow. Then, give the tub a gentle rock to make sure it's firmly attached to the studs.
Finishing Touches
Your new bathtub is installed! Now it's time to add those finishing touches that'll make your bathroom look amazing and work perfectly for everyone.
Re-Tiling or Refinishing the Surround
First up, let's tackle the surround—the area around your tub. If you're re-tiling, pick tiles that complement your new tub and can stand up to water.
Ceramic tiles are a popular, durable choice, or you could opt for waterproof panels for a smooth, modern vibe. Hexagonal tiles are suitable for a modern look.
Tip: Seal the tiles well with grout or sealant to block water from sneaking behind them.
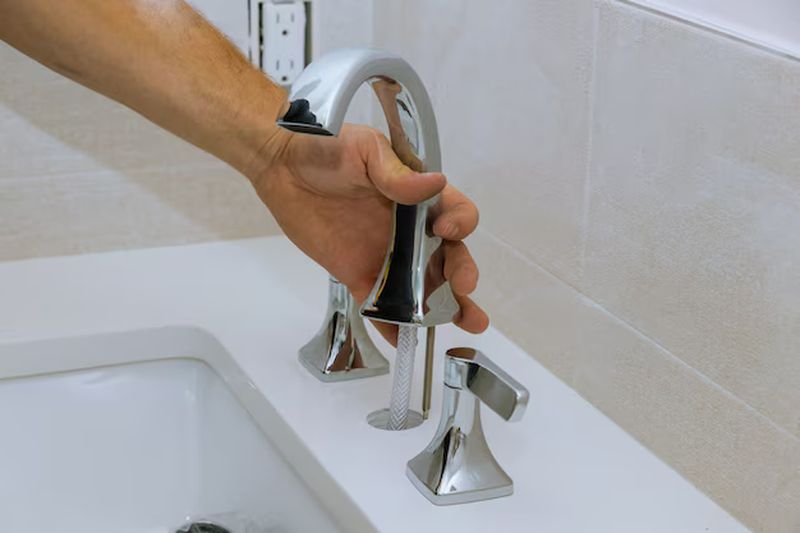
Installing a New Bathtub Faucet and Fixtures
Next, it's time to install your faucet and fixtures. Choose ones that match your tub's style and are user-friendly. Installation is usually simple—just follow the instructions that come with them.
Tip: Go for a finish that resists water spots and fingerprints to keep them looking polished with minimal upkeep.
Adding Accessibility Features
Safety matters, so let's make your bathroom accessible to all. Add grab bars for extra support—they're a must for anyone with mobility needs. Secure them firmly into the wall studs for strength. Then, place a non-slip mat in the tub to prevent slips.
Tip: Pick a mat that's easy to clean and fits your tub just right according to the ASTM F1637-13 slip resistance rating.
Dealing with Unexpected Issues
Even with the best planning, surprises can pop up when you're changing a bathtub.
Repairing Water-Damaged Subfloor or Walls
If you spot soft spots, discoloration, or warped wood in the subfloor or walls, it's important to fix it before installing your new tub. Here's how:
- Identify the damage: Look for any areas that feel spongy or discolored.
- Remove damaged materials: Carefully cut out the affected sections of the subfloor or drywall.
- Dry the area: Use fans or a dehumidifier to make sure everything is completely dry.
- Replace with moisture-resistant materials: Install new subflooring or cement board, which can handle water better.
- Seal it up: Use waterproof sealant around joints and edges to prevent future leaks.
Addressing Mold or Rot Behind the Tub
If you find black spots (mold) or soft, crumbling wood (rot), it's crucial to tackle it right away. Here's what to do following the EPA Mold Remediation Guidelines:
- Wear protective gear: Put on gloves and a mask to stay safe.
- Clean mold with a mold-killing solution: Spray it on and scrub the area thoroughly.
- Replace rotten wood: Cut out the damaged wood and install new, treated lumber.
- Ensure the area is dry: Use fans or open windows to air it out before moving on.
Upgrading Outdated Plumbing During Removal
Sometimes, you'll find old pipes that don't meet today's standards. This is a great chance to upgrade! Here's why it's worth the effort:
- Modern pipes are more durable: They're less likely to leak or burst.
- Better water pressure: New plumbing can improve how well your fixtures work.
- Fix existing issues: If you've had plumbing problems before, now's the time to solve them.
Ensuring Proper Ventilation
Good airflow is key to preventing future mold and moisture problems. Here's how to make sure your bathroom stays fresh:
- Install an exhaust fan: If you don't have one, now's the time to add it.
- Choose the right size: Make sure the fan is powerful enough for your bathroom's square footage.
- Run the fan regularly: Turn it on during and after showers to keep moisture levels low.
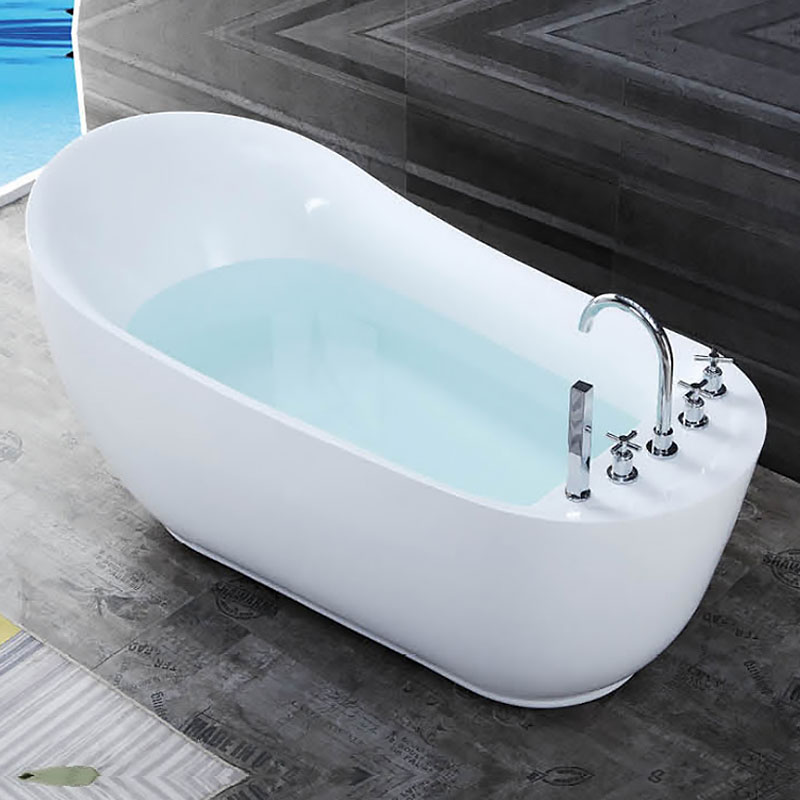
Choosing the Right Replacement Bathtub
Selecting the perfect replacement bathtub can feel overwhelming, but we're here to make it easy!
Material Comparisons: Acrylic, Cast Iron, and Fiberglass
The material of your bathtub affects its durability, cost, and upkeep. Here's a quick comparison to help you choose:
Material |
Pros |
Cons |
|---|---|---|
Acrylic |
Lightweight, easy to install, retains heat well, affordable |
Can scratch easily, may fade over time |
Cast Iron |
Extremely durable, retains heat best, timeless look |
Heavy, requires strong floor support, high-end cost |
Fiberglass |
Budget-friendly, lightweight, easy to clean |
Less durable, can crack or fade, doesn't retain heat as well |
Freestanding vs. Alcove Tubs: Pros and Cons
Next, let's look at the two main styles: freestanding and alcove tubs.
Type |
Pros |
Cons |
|---|---|---|
Freestanding Tubs |
Stylish, can be placed anywhere, creating a spa-like feel. |
Take up more space, is often high-end cost, harder to clean around. |
Alcove Tubs |
Space-saving, fits into a three-wall nook, usually more affordable. |
Limited design options, can feel less luxurious. |
Which to choose? If your bathroom is small or you're on a budget, an alcove tub is a smart pick. If you have more space and want a statement piece, go freestanding.
Sizing Tips for a Perfect Fit
Getting the right size is crucial for both comfort and installation. Here's how to nail it:
- Measure the space: Check the length, width, and height of the area where the tub will go.
- Consider the tub's dimensions: Make sure it fits through doorways and hallways—measure those too!
- Think about comfort: Standard tubs are 60 inches long, but taller folks might prefer 66 or 72 inches.
- Check weight capacity: Ensure your floor can support the tub, especially if it's cast iron.
Hire a Professional vs. DIY Bathtub Replacement
Changing a bathtub can be a big project, and one of the first decisions you'll need to make is whether to hire a professional or do it yourself.
Projects Requiring Structural/Plumbing Expertise
Some bathtub replacement projects are more complicated than others. If your project involves big changes—like moving the tub to a new spot or changing the bathroom's layout—it's smart to hire a professional.
These jobs often need serious plumbing work or changes to your home's structure, which can be tough without the right skills. A professional knows how to do this safely and make sure everything is set up correctly. This helps prevent issues like leaks or wobbly floors later on.
Cost Comparison: DIY Savings vs. Contractor Fees
Here's a clear look at what you might spend:
Option |
Average Cost |
Pros |
Cons |
|---|---|---|---|
DIY |
$500 - $1,500 |
Save money on labor, feels rewarding |
Take a lot of time, needs skill, and risk of errors |
Hire a Professional |
$1,000 - $4,000 |
Expert work, done fast, meets codes |
More expensive, less control over the job |
Key Point: DIY saves cash but takes time and effort. You'll need to handle plumbing, remove the old tub, and install the new one. If that sounds overwhelming, a pro might be worth it.
Permits and Code Compliance Considerations
Depending on where you live and what you're doing, you might need a permit to replace your bathtub. Building codes are rules to keep homes safe. Projects with plumbing or structural changes usually require a permit.
- Hiring a Professional: They deal with permits and ensure the work follows local codes.
- DIY: You'll need to check your local rules and get any permits yourself.
Cost Breakdown: What to Budget
Replacing a bathtub is an exciting project, but it's smart to know what you'll be spending before you dive in.
Bathtub Cost: $300–$5,000+
The bathtub is the star of the show, and its price can vary widely based on a few key factors:
- Material: A basic acrylic tub might start around $300, while a luxurious cast iron or stone tub could set you back $5,000 or more.
- Style: Simple alcove tubs (the kind that fit against walls) are usually cheaper than freestanding or clawfoot tubs, which can get pricey.
- Brand: Big-name brands often cost more but might offer better quality or warranties.
Labor Fees (if Hiring a Pro): $1,000–$4,000
Hiring a professional to handle the job? Labor costs will depend on how tricky the project is. Here's what's typically included:
- Easy Jobs: Swapping a tub in the same spot might keep costs on the lower end, around $1,000.
- Complex Jobs: Moving the tub or redoing the layout could push costs closer to $4,000.
Hidden Costs: Repairs, Permits, Disposal
These are the costs that can catch you off guard if you're not ready. HomeAdvisor notes 15% average overrun in bathroom projects. Budgeting a little extra here is a lifesaver:
- Repairs: Pulling out the old tub might reveal water damage or mold. Fixing that could add a few hundred dollars (or more) to your tab.
- Permits: Usually cost $50–$200 depending on local rules.
- Disposal: Getting rid of the old tub isn't always free. A heavy cast iron tub might mean renting a dumpster or paying a fee, especially if you're DIY-ing. (Pros might include this in their quote)
Common Mistakes to Avoid When Replacing a Bathtub
Changing a bathtub can transform your bathroom, but it's a project where small oversights can lead to big problems.
Not Turning Off the Water Supply
One of the worst mistakes you can make is forgetting to turn off the water supply before you begin. Skipping this step risks flooding.
Skipping Waterproofing Steps
Waterproofing might feel like an extra hassle, but it's essential for protecting your bathroom from water damage, mold, and rot. Skipping it can lead to costly repairs later.
Use waterproof membranes or sealants around the tub and shower area to keep water where it belongs.
Misaligning the Tub During Installation
A tub that's not properly aligned can wobble, leak, or even crack over time—not to mention it could be unsafe. To avoid this, use a level tool to ensure the tub sits evenly, and secure it tightly to the wall studs.
Over-Tightening Plumbing Connections
It's tempting to crank those plumbing connections as tight as possible, but overdoing it can damage pipes, strip threads, or cause leaks. Tighten fittings just enough to be snug—stop when you feel resistance.
Damaging the Surrounding Walls or Floor
Changing an old tub or installing a new one can accidentally harm nearby tiles, walls, or floors if you're not careful. Take it slow, use the proper tools, and protect surrounding areas with drop cloths or cardboard.
Improper Sealing
A weak or sloppy seal around your tub is an open invitation for water to seep into walls and floors, leading to mold and damage. Poor sealing causes $2,000+ in water damage.
Ignoring Building Codes
Building codes exist for a reason—they ensure your installation is safe and legal. Ignoring them could mean safety risks, fines, or issues when selling your home. IPC 405.5 requires a 1/4-inch caulk bead.
Maintenance Tips for Your New Bathtub
Congratulations on your shiny new bathtub! To keep it looking great and working well for years, a little care goes a long way.
Cleaning and Preserving Surfaces
Keeping your bathtub clean not only makes it sparkle but also helps it last longer. Here's how to do it right:
- Use gentle cleaners: Stick to non-abrasive cleaners like dish soap or a mild all-purpose cleaner. Harsh chemicals can scratch or dull the surface, especially on acrylic or fiberglass tubs.
- Avoid abrasive tools: Use Scotch-Brite Non-Scratch Scrubbers.
- Clean regularly: Wipe down the tub after each use to prevent soap scum or stains. A quick rinse and dry keeps it looking new.
- Handle tough stains: For stubborn spots, try a mix of baking soda and water—apply it gently, then rinse well.
Preventing Leaks and Cracks Long-Term
Leaks and cracks can sneak up if you're not careful, but a few habits can keep them at bay:
- Check for leaks often: Every few months, inspect the drain and overflow connections for drips. Catch small issues before they grow.
- Avoid heavy impacts: Don't drop heavy objects in the tub, as they can cause cracks, especially in fiberglass models.
- Use the tub properly: Stick to its intended use—avoid standing or jumping in it, which can stress the material.
- Maintain water temperature: Extremely hot water can weaken some tub materials over time, so keep temperatures reasonable.
When to Reseal Caulk or Grout
The caulk or grout around your tub is your defense against water sneaking into walls or floors. Over time, it can crack or peel, so here's when and how to reseal:
- Look for warning signs: If you see cracks, gaps, or mold in the caulk or grout, it's time to replace it.
- Reseal every 1–2 years: Even if it looks okay, fresh caulk keeps things watertight. For grout, check yearly for wear.
- How to reseal: Remove old caulk with a scraper, clean the area thoroughly, and apply new waterproof silicone caulk. Smooth it with a tool or finger for a neat finish.
- Grout care: If tiles are loose or grout is crumbling, reapply grout or call a pro for a clean fix.
FAQs About Removing and Replacing a Bathtub
We'll answer the most common questions people ask about how to remove a tub:
Do I Need a Plumber to Install a Shower?
Not always, but it depends on the project. If you're replacing a bathtub with a shower and keeping the same plumbing layout, a skilled DIYer with plumbing experience might handle it.
However, if you're moving pipes or changing the setup, a plumber is a smart choice.
How Long Does It Take to Remove a Bathtub?
Removing a bathtub typically takes 4–8 hours for a DIYer, depending on the tub's material and setup.
If you're hiring a professional, they can often finish in 2–4 hours due to their tools and expertise.
Do You Have to Remove Tile to Replace a Bathtub?
Not necessarily! If the tiles are only around the tub's surround and not attached to the tub itself, you might keep them.
However, if tiles overlap the tub's edge or are part of an integrated surround, you'll likely need to remove them.
Is It a Good Idea to Replace a Tub with a Walk-In Shower?
Switching to a walk-in shower can be a great choice, especially if you rarely use the tub or want a modern, accessible bathroom.
How Much Does It Cost to Remove a Bathtub and Make a Walk-In Shower?
Converting a bathtub to a walk-in shower typically costs $2,000–$12,000, depending on several factors:
- DIY Costs: Around $1,000–$3,000 for materials like a shower base, tiles, and plumbing supplies.
- Professional Costs: $2,000–$12,000, including labor ($1,000–$5,000) and materials. Custom showers with glass doors or fancy tiles cost more.
- Extras: Add $200–$1,000 for permits, disposal, or fixing unexpected damage like mold.

Conclusion
Uninstalling your bathtub is a project that can protect your investment with regular upkeep.
Now that you've got all this info, it's up to you to decide what's next. Feeling ready to grab a crowbar and tackle this yourself? Awesome—you've got the skills to make it happen! Or maybe you'd rather call in a pro to handle the heavy lifting.
Senhang Sanitary offers 10-year warranties for worry-free upgrades. Our top-notch bathtubs and expert installation services are designed to turn your bathroom dreams into reality.
More Reading


Request Free Quote Today!
Senhang Sanitary is a manufacturer of high-quality sanitary ware based on innovative technology. We are always ready to help with your building and infrastructure projects.
Please leave your contact details below, and we'll get back to you within 8 business hours to discuss your needs.
Stay Updated With Our Latest News & Products
© 2026 Senhang Sanitary Ware. All Rights Reserved.
Products
Contact Info
-
 inquiry@jabrasanitary.com
-
 +8613829077699
-
 +8613829077699
-
 No. 1, Zhenxing Road,
Chaoan District, Chaozhou City,
Guangdong Province, China